Monday, 31 October 2016

Boardgame session: 29Oct2016


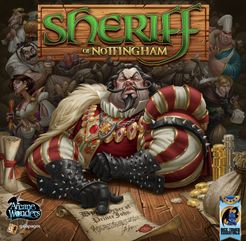
We visited my sister for the w/e, and I received my belated birthday prezzie – the boardgame ‘Sheriff of Nottingham’. Elaine and I had previously played this at this years’ Games Expo event and really enjoyed it. So, I immediately punched out the counters and set up a game (shuffling the ~150 cards is quite a task!).

The game rules are simple and all players quickly got into the swing of things – a good combination of honesty and lying by all. This is very much a game of bluff, with a nice mix of bribery added. I think all players could improve their bribes, we tended to stick to simple cash offers rather than use goods or promises. Somehow no-one ever seems to believe Elaine, so her bag was nearly always searched! I don’t think lying comes naturally to her, and I feel she could exploit this trait to force the sheriff to pay out for legal shipments. As I originally surmised when I first encountered this game; Erin would be a good player. When the final points were tallied, Erin won with a 20 point lead over myself. Gill was third and Elaine trailed, but not by much. Having a lead in chickens, together with a few high value smuggled goods, seemed to be the key to Erin’s success. All players enjoyed the game and predicted that it would get many more plays.

Friday, 21 October 2016

Review of Bolt Action version 2 Rules


I finally decided to purchase a copy of the latest Bolt Action version 2 rules by Alessio Cavatore & Rick Priestley (Warlord Games/Osprey, 2016) a few weeks ago. I should stress that I have no significant previous experience of the first version, and therefore cannot comment about changes made. I have also never played 40K, so cannot say whether Bolt Action are similar or not. Since they arrived I have played approximately a dozen solo 1,000 point games using a diverse range of army lists, all late war European games. Some games involved standard infantry-heavy forces, whereas others had various tank add-ons, or infantry in APC’s etc. Most games used regular units but I did try inexperienced units, and veteran units. All games used the supplied scenarios and I have now played most of the 12 scenarios listed.

The publication is a beautifully illustrated, A5 sized, hardback. The use of Osprey as the publisher means that many of their excellent pictures are included, and these are augmented by a scattering of photos showing various nicely painted miniatures. There is surprisingly little ‘fluff’, which is personal bug-bear of mine, and a brief timeline of WW2 is solely there as an intro. The rules revolve around a re-enforced infantry platoon structure with tanks/armour playing an ancillary role. This is exactly the size of 20/28mm game I wish to play, which is great. As a consequence the rules are infantry focussed, with the section on vehicles, artillery/air supports and urban fighting added after the main rule structure has been explained. Next there are 12 different scenarios, all briefly explained and providing alternatives to the simple meeting engagement. Finally there are basic army lists for the 5 major late war protagonists: Germany, USA, UK, USSR and Japan. These lists are not exhaustive but do provide enough information to allow representative forces to be generated. Bolt Action do sell additional books on each army and/or theatre giving greater detail and expansion opportunities, but I’m personally not sure I will go down this potential financial sink-hole! I hope to peruse friends copies to garner the small amounts of additional information I may require. It is interesting that the lists in the main rule book do miss a few ‘obvious’ entries: no German Panzerschreck teams, no US Marine flamethrowers, no British 2” mortars, no Russian tank-riders. Maybe this is to encourage players to buy the supplements?

The rules themselves are well written and have numerous clear illustrations to highlight the mechanics. When I needed to check an issue in a game I was able to quickly find the relevant section in the book. All the rules use the standard 6-sided dice (no fancy dice required).

The assignment of orders by the random drawing of custom order dice from a bag works well (the authors do discuss cheaper alternatives to these dice), and the range of orders available are consistent with those found in many other rules. The random nature of the turn order allows for uncertainty, reflecting the ‘fog of war’, and makes the rules very suitable for solo play. Officers, especially higher ranks, can be useful for co-ordinated moves, particularly early in the game, by drawing additional dice. The non-active player can choose to order a targeted unit ‘Down’ to significantly reduce the effects of incoming fire, but this burns a valuable turn for that unit.

Movement is simple, both for infantry and vehicles; either an ‘Advance’, which allows firing or crossing difficult terrain, or the double speed ‘Run’ order. Bolt Action scenario games tend to only last 6-8 turns, so there is little time to carefully manoeuvre or set–up an attack, instead forces tend to get in fast. There is no subtlety in the infantry tactics; you cannot use your MG34 to provide covering fire as the riflemen of the same squad dash across the street, the whole section moves or not. Combat can occur in the very first turn of a game!

Firing is also simple with a basic 3+ to hit (plus a few modifiers), followed by a quick ‘to kill’ dice roll (adjusted by the target quality). Bolt Action games are bloody, but hits also inflict ‘Pins’ even if no kills result, which can be as significant as actual kills. Units with multiple ‘Pins’ can just sit around with their heads down, and often require rallying (which is surprisingly easy but does negate a valuable turn). Additionally, weakened units can suddenly evaporate leaving alarming holes in your lines at the most inopportune times! Anti-tank fire is simple, requiring a penetration dice roll and damage effect if successful. Bolt Action is not a set of rules for ‘tankie’ gamers; there are only 4 levels of gun and 4 levels of armour. So, if your thing revolves around variation between a PzKfw IV model F2 compared to the H model, then these are not the rules for you! I soon learnt that the German player should take plenty of cheap Panzerfausts. Firing HE rounds again uses similar mechanisms and employs circular templates of different diameters to determine the number of potential hits. From previous gaming experience this can cause issues in opposed games; is the figure just in, or out, of the blast zone? The irritating situation I commonly found using the rules, concerned Snipers. They seemed to be far too deadly, picking of key team members at will, and the best counter was to use your own sniper to take out the opposing sniper.

In Bolt Action close combat is more frequent compared to other rules I have played, and it is devastating and decisive. The loser is KO’d and removed from the game. The defender’s best defence is to employ an ‘Ambush’ order to fire as the attacker comes in. But the question is whether to maintain this order at the turn end and not fire at all (because you were not assaulted), or try to convert it into a ‘Fire’ order and cause some damage to enemy units? You can find opposing units both quietly sitting waiting for the other to blink, resulting in an uneasy truce!

Off-table artillery strikes and close air support rules are interesting because you are not certain about what will arrive, or when. In addition to damage inflicted, they can cause widespread disruption by placing multiple ‘Pins’ on units close to the target zone. The British ‘free’ FAO team is a powerful bonus, and the US FAC team with a second strike capability can also be deadly. I’m not sure the Russian Katyusha elements should be an on-table support option. I also liked random nature of air strikes and the panic they cause to both sides, plus the possibility of friendly A/A fire occurring.

So, what do I think of Bolt Action version 2? How do they compare with my other WW2 favourite, Chain of Command? Bolt Action gives a very fast, action packed game that is fun to play. The simplicity of the rules means there is little referring back to the main book and QRS covers most situations (in fact, most actions don’t even require the QRS). They work very well for solo play, and I look forward to playing opposed games in the near future. I would summarise by saying Bolt Action gives a good ww2-GAME, compared to Chain of Command which gives a good WW2-game. I think I will continue to use Chain of Command for opposed games against experienced players, but Bolt Action will now be used for my solo play and those quick, pick-up club games against non-WW2 gamers. I think it interesting that both sets of rules focus on the same command level i.e. the re-enforced infantry platoon. If I wanted to play using a higher command level with more troops, especially tanks, I would probably opt to use the Battlegroup Kursk/Overlord rules.

Readers thoughts, comments, criticisms, disagreements are always welcome. Finally, Bolt Action has encouraged me to play more WW2 games and I’m now seriously considering buying a matching pair of Japanese and US Marine forces.
Tuesday, 18 October 2016

AAR; ACW (Longstreet rules) 16 Oct 2016


We managed to fit in another Longstreet ACW battle (late 1864) of the mini-campaign. This time we played the ‘Railway Embankment’ scenario, and I again won the scouting phase and choose to be the defender. Additional terrain was added, with Ian placing some woods just forward of my deployment area, whilst I placed areas of swamp across his lines of approach. Ian placed the objective marker as far to my right as possible. I chose to leave my new 10-base US Coloured unit (E/R) as my off-table reserve (arriving on turn 6). I forgot my camera (again!), so no photo’s. Ian did take a couple on his phone and I may add these to this report at a later time.

In the opening turns I advanced my battleline forward to give me some breathing room. The central wooded area Ian placed actually helped me because I deployed my 2 sharpshooter units in them. It soon became clear that Ian’s attack would fall upon my centre, and especially on my right flank. I deployed a battery of Napoleons (37th Pa) and a unit of men armed with repeaters (8th Maine) on the gentle hill to block this. I was also able to redeploy my other 4-base Coloured unit (E/R) and a battery of light rifles to act as a reserve, and cover the objective.

For some reason, Ian did not press his attack in the centre and seemed to be content to remain just outside 6” engagement range. His main focus was on my right flank, but again he initially concentrated on fire combat rather than coming straight in. This gave me time to bring on my strong reserve formation and at this point I was confident of victory. Ian finally KO’d my artillery battery and charged the 8th Maine, who were totally destroyed, but of course his troops were now vulnerable to my counter-attack. The large and eager US Coloured units duly obliged and were successful. The Union was now very much in the ascendency and began an advance in all areas. The Rebel loses mounted as they were forced back and finally victory was achieved.

In the Campaign phase, I rolled well, lost few bases and none of my units lost any Elan. I did not successfully roll for promotion, but achieved the coveted 4 Eagle rank by drawing a promotion Campaign card. My revised force for the 9th and final battle of the campaign is shown below:

Commander
Personality
Rank
EP’s
“Art” Rooney
Indian Wars Veteran
(Scout: 2D6 & keep higher)
4 Eagles (2/64)
30
Unit
Type
Elan
Exp.
Strength
Notes
37th (Prov) Pa Infantry
INF
Season
Veteran
6
 
13th\14th Pa (Prov) Inf.
INF
Season
Veteran
4
Sharpshooters (5,6 Skirm Fire)
16th\45th Ohio (Prov) Inf.
INF
Caut.
Veteran
4
Sharpshooters (5,6 Skirm Fire)
26th NJ Artillery
ART
-
-
3
3x Lt Rifle
29th NJ Artillery
ART
-
-
3
2x Lt Rifle, 1x Hvy Rifle
7th US (Coloured) Inf.
INF
Eager
Recruit
4
 
8th Maine
INF
Season
Veteran
4
Repeaters
10th Vermont
INF
Season
Veteran
4
 
11th US (Coloured) Inf.
INF
Eager
Recruit
9
Sharpshooters (5,6 Skirm Fire)
1st NH Artillery NEW
ART
-
-
2
2x Lt Rifle
3rd NH Infantry NEW
INF
Season
Recruit
7


50 bases
 
Sabotage: enemy removes an extra 4 cards when first re-shuffles.

Notes: The units are listed in order of campaign appearance. The Pa units are from my original force. The 9th Pa Artillery (the only original unit left) was destroyed.

At the end of this game I have amassed an unassailable EP points lead (with 6 wins, 1 draw, 1 loss). In all our games, apart from the draw, the attacker has lost. Because of my Indian Wars characteristic, Ian’s Rebels have generally been forced to attack. He is understandably beginning to get a bit ‘peeved’ about this, so for the final game I have agreed to take on the role of attacker. We will be playing the ‘Walled Farm’ scenario, which leaves the ‘River Crossing’ scenario as the only one we have not tried out. This is some relief to me because I think the ‘River Crossing’ is heavily weighted in favour of the defender!

Thursday, 13 October 2016

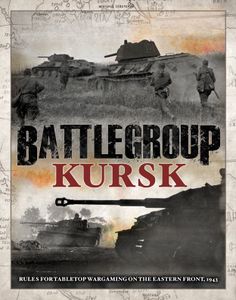
Review of Battlegroup Kursk rules


In an earlier blog post about whether to get the new Bolt Action WW2 rules, I mentioned some other rules I had tried, and I considered revisiting Chain of Command (CoC). When I went to my rules shelf I noticed a rules bundle I had purchased at a B&B stall (I can’t remember where or when) and I had never untied, or looked at them, once I had got home. These were the hardback books Battlegroup Kursk (BGK), the Battlegroup Overlord supplement and an A5 softback version of the rules (all together costing me only £20 compared to a RRP of £70!). So, rather than play CoC again, I decided to give BGK a go. I have managed to play a few solo games all using Eastern front 20mm forces on a 6’x4’ table and 250 points (i.e. Squad level game).

The ‘Orders’ section of rules is straightforward; all the standard, obvious options are available and include reactive orders, allowing covering fire etc. The reactive movement (rather than the reactive fire) order is a bit strange, and I never used this in my games. The turn order is IGO-UGO and number of orders available to a player results from a single D6 roll plus the number of officers in the force, which can give widely fluctuating results. Larger games use multiple D6’s and give a more standard range of results. Some things were not clear: German infantry sections have 2 teams (rifle and LMG) and I was not sure whether this needed a single order (in which case, why have separate teams listed), or individual orders (in which case, the German player will struggle with the number of orders required)? Reading the Overlord supplement, I found a rule for separating Bren teams from their sections in the British listing, and I decided to use this for the German sections/teams in my games (I’m still not sure if this is correct). I also was not clear about man-portable heavy weapon teams (HMG, mortars etc.), because there did not appear a requirement to set them up; could they simply move and fire like normal infantry teams, or should they be considered as Very Light weapons teams and need an ‘unlimber’ phase before firing?

The ‘Movement’ section is again nice and simple, but maybe too simple? There is no deduction for infantry movement in rough/difficult terrain. OK I can live with this, but I instinctively feel that marshes, woods, hedgerows etc. would have an impact. What do you class man-portable heavy weapons as? I think lugging a heavy base-plate for a mortar would significantly slow you down. Tracked armoured vehicles can weave about with no apparent deduction; I had a T-34 move down a road in a village, take a sharp 90 degree turn, then make another 90 degree turn around the side of a house, and then another sharp turn to face the enemy, all with no speed reduction.

The ‘Direct Fire’ mechanisms are again streamlined, all basically following the same procedure: observation, hit, save/penetration. I quite liked the fact you may not necessarily see the target and therefore not fire; and also liked the differentiation between firing for effect and pinning/covering fire. Pinning is pretty much as valuable as killing targets, due to morale effects discussed later. I had no major quibbles about weapon ratings etc., except possibly the German MG34/42 is over-rated? A rule that I used frequently was when a squad was trying to close assault; if multiple casualties are inflicted, you can instead take a single loss, retreat back to cover and become pinned. The vehicle listing seems to indicate that players should record the number of rounds fired. Really? I ignored this in my games – Life is too short for such nonsense!

The ‘Indirect Fire’ section follows a similar process but does raise some issues. I liked the ‘Communications’ aspect for calling higher command support, but this does burn a players order count. The accuracy dice roll again seems a bit random, and you can cancel the fire order if the ranging round falls short. There is no ability to ‘walk-in’ the artillery in subsequent turns, and the danger zone is standardised and not related to the calibre and number of weapons firing. The biggest omission is the lack of smoke rules, which is very strange indeed!

The ‘Morale’ section can be split into two. At a unit level, a casualty or non-penetrating hit results in a simple D6 dice roll, Veteran/Elite troops can re-roll, but this seemed to me to be too simplistic. Troops that are already ‘Pinned’ and fail, rout off. If a player rolls a straight 6, then the unit has a chance to take an immediate counter-action. At the battlegroup level, each force has a numeric strength and morale effects result in the random drawing of ‘Chits’ that reduce this value. I really like the uncertainty this mechanism introduces, particularly because it can result in occasional side effects e.g. mine strike, air strike etc. Reduction of battlegroup morale to zero results in defeat. Strangely, rallying unit/units from Pinning requires the drawing of a chit to rally D6 units. It would seem that waiting for the number of Pinned units to rise before rallying would be sensible, but this is often not practical. Units that tend to be pinned are those at the focal point of your plans, so you cannot wait to get them active again, and therefore you have to rally even if only a single unit needs such treatment. I have found games to be frequently lost simply by the effects of pinning opposing units, and obliging an opponent to rally. Maybe my game play and/or tactics are at fault, and I would be interested to hear what other gamers think?

Before I discuss the non-rules aspects of the BGK publications, I will comment about the type of game they give. I like the speed of play, the mechanisms are clean and simple, and the use of chits to determine victory is good. The order system is fine but rather random when using ‘Squad’ level games. Combat is clear and does not require constant double checking in the main rules. The main weakness lie in the unit morale system (too simple) and rallying. The lack of smoke rules is bizarre! Overall, I cannot see BGK becoming my go-to WW2 rules. I will stick to CoC, which I think gives a better game, and I also still intend to try the new version of Bolt Action.
The A5 paperback rules are excellent (only £10). Regarding the hardback publications (£25-30 each), I would be very disappointed if I had purchased them at the normal price. Why do authors think they have to provide pages and pages of potted history in such publications? If a reader wants historical background then there are a wealth of sources, online or published, that can be easily accessed and  provides for all needs, in greater detail and accuracy than provided in these rule publications. They then add in a simple painting guide as well. Do they think a person buys BGK as their sole source on a period, especially ones as well documented as Kursk or Overlord? I’m sorry to say that I find this ‘fluff’ annoying, especially because it’s inclusion bulks up the book and results in increased cost for little benefit. The majority of both hardback books centre on army lists. I generally enjoy a good army list. I find they inspire me to investigate/get new units, and I like the way they constrain players to field forces that feature the common elements used historically. There are poor army lists out there, which some players can exploit to generate ‘super’ armies but, on the whole, I like an army list. The lists provided in Battle Group Kursk/Overlord are bad! Not because they are inaccurate, unhistorical, or unbalanced, but because they are extremely repetitious and tedious. For example BGK has only 4 lists: German Panzer & Infantry, Russian Tank & Infantry. This is fine, but each list repeats the information in the previous list. They share the same elements on the whole; a German infantry platoon/squad is the same in both German listings, as are the tank units, support units, recce units etc. etc. I’m sure there must be a few variations between lists, but 90%+ of each list is repeated information. The format of the army lists is again poor; each list takes a dozen sides of A4, when a better format could easily reduce this to a couple of pages! With a bit of thought and editing the authors could reduce the entire rules to the A5 rules booklet and separate, smaller, slimmer, A5 army listings. Even better would be to publish the army lists online as free pdf files! Such a decision would make BGK an attractive purchase, but in the present form I would not recommend these rules to another gamer! What is even more astounding is the authors are producing further campaign dedicated hardback books! Rather than finish on a negative note, I do like the inclusion of minor, often neglected, support elements e.g. combat medics, signallers, repair mechanics etc.

Tuesday, 11 October 2016

AAR; ACW (Longstreet rules) 9 Oct 2016


This was the 7th battle (early 1864) of a 9 battle mini-campaign using Longstreet rules by Sam Mustafa (Honour Publishing). My Union force played against the Rebels commanded by Ian. I was ahead in the campaign by 5 victories to 1 defeat (24:21 EP), and in each battle the defending force had won. The composition of my force can be viewed in my previous blog post (November 2015).

 We randomly selected the ‘Meeting Engagement’ scenario and there was minimal additional terrain added. This scenario is interesting because there are no objective markers and there is no advantage to being either the attacker or defender. So this should be an equally matched contest. The thing we had not taken in to account was the club AGM which was also scheduled for the afternoon. Like all club AGM’s I have ever attended, this went on longer than expected, and so the time available for our game was severely curtailed. We decided to carry on in the couple of hours left to us.

Both armies entered from diagonally opposite corners, so the first turns involved rapid movement in columns, followed by deployment into battle lines. All my games against Ian seem to involve great swings in lucky/unlucky dice rolling. The ‘dice gods’ seem to be toying with us. In this game whenever I had a situation that I was optimistic about, I rolled badly. Whereas when I was in trouble and pessimistic, I rolled exceptionally well! My vastly superior artillery just could not destroy an opposing Rebel battery despite numerous opportunities to roll 4+. A successful charge by a fresh Union infantry unit against another exposed, isolated rebel battery was repelled by melee combat! In contrast, I shot at a 5 strong Rebel unit with 10 dice needing 4+ to hit, scored 10 hits, most of which converted in to kills, wiping it out in a single turn! Ian pressed a well co-ordinated attack against my left flank and I thought I was in deep trouble, but here luck was on my side: firstly, I played the ‘They couldn’t hit a...’ interrupt card which removed all of Ian’s careful hoarded 6 cards just prior to his key attack turn; then in my turn, I used a recently obtained ‘Retrograde’ card to move my endangered units out of the path of attack. Without my fortunate card play, I’m certain the game would have been lost! On my right flank the action did not develop as quickly, but I was confident that my 7 base coloured regiment and battery of 3 Napoleon guns would hold their own.


Unfortunately time was not on our side and the game ended early in a draw. Both sides had lost 10-15 bases each (the victory target was 23). I felt I had played poorly (I only scanned the rules before the game and was very rusty) and that Ian had the upper hand, so a draw was a good result in this game. Due to the constraints of time, I only took 1 photo and this was as we were doing the (hurried) campaign phase at the end (also the battery was out of juice, and the photo was taken accidentally!). Neither of our commanders was promoted (Ian need not have rolled because he has already reached the maximum 4 Eagle rank). My army did suffer in the campaign attrition phase, with my coloured regiment losing 3 bases! My campaign cards yielded an improvement to scouting in the next game (as if I needed such a bonus), a couple of new units (including another large coloured regiment), plus repeaters for my Maine regiment. My Union force available for battle number #8 will be:

Commander
Personality
Rank
EP’s
“Art” Rooney
Indian Wars Veteran
(Scout: 2D6 & keep higher)
3 Eagles (2/63)
26
Unit
Type
Elan
Exp.
Strength
Notes
9th Pa Artillery
ART
-
-
3
3x Napoleon
37th (Prov) Pa Infantry
INF
Season
Veteran
7
 
13th\14th Pa (Prov) Inf.
INF
Season
Veteran
4
Sharpshooters (5,6 Skirm Fire)
16th\45th Ohio (Prov) Inf.
INF
Caut.
Veteran
4
Sharpshooters (5,6 Skirm Fire)
26th NJ Artillery
ART
-
-
3
3x Lt Rifle
29th NJ Artillery
ART
-
-
3
2x Lt Rifle, 1x Hvy Rifle
7th US (Coloured) Inf.
INF
Eager
Recruit
4
 
8th Maine
INF
Season
Veteran
5
Repeaters
10th Vermont NEW
INF
Season
Veteran
6
 
11th US (Col.) Inf. NEW
INF
Eager
Recruit
10


49 bases
 
Broken Code: add +2 to scouting score in next game.
Notes: The units are listed in order of campaign appearance. The Pa units are from my original force. The 37th Pa, 12th NH and 88th NJ were so battered that they were combined in to the ‘new’ 37th (Prov) Pa regiment.